今天借助腾讯云大模型知识引擎原子能力提供的文档解析API快速提取图片信息为MD文档的WinFomr应用小案例,感兴趣的朋友可以看一下!
一、大模型知识引擎 LKE介绍
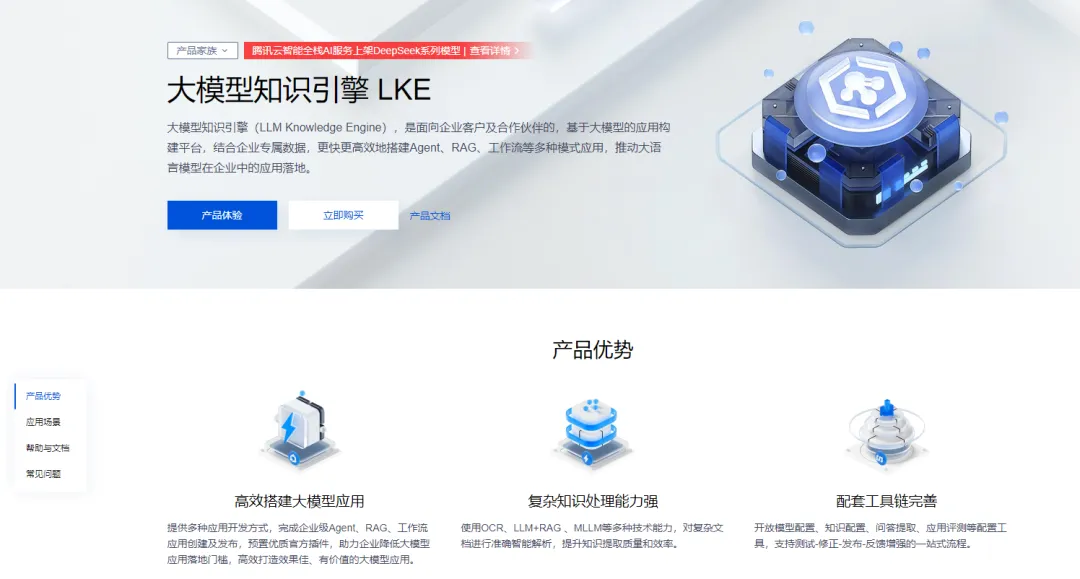
官方介绍:大模型知识引擎(LLM Knowledge Engine),是面向企业客户及合作伙伴的,基于大模型的应用构建平台,结合企业专属数据,更快更高效地搭建Agent、RAG、工作流等多种模式应用,推动大语言模型在企业中的应用落地。
 图片
图片
大模型知识引擎 LKE: https://cloud.tencent.com/product/lke
1.1 如何开通服务?
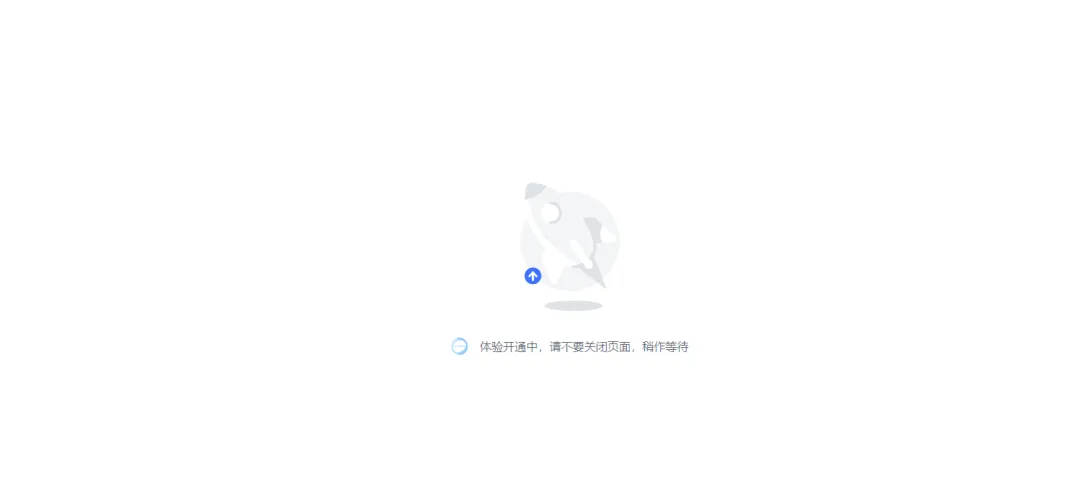
点击【产品体验】按钮进入服务开通页面大概需要半分钟左右的时间,具体如下图:
 图片
图片
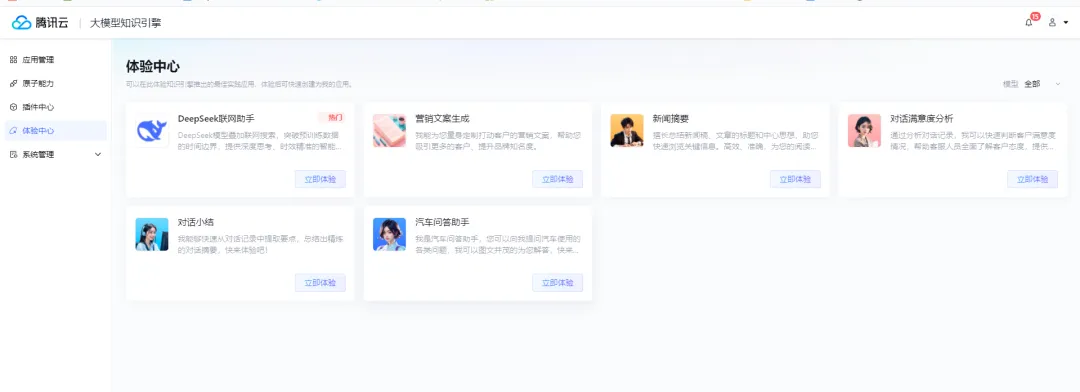
开通成功之后如下图:
 图片
图片
1.2 大模型知识引擎组成
大模型知识引擎主要分为四个模块:
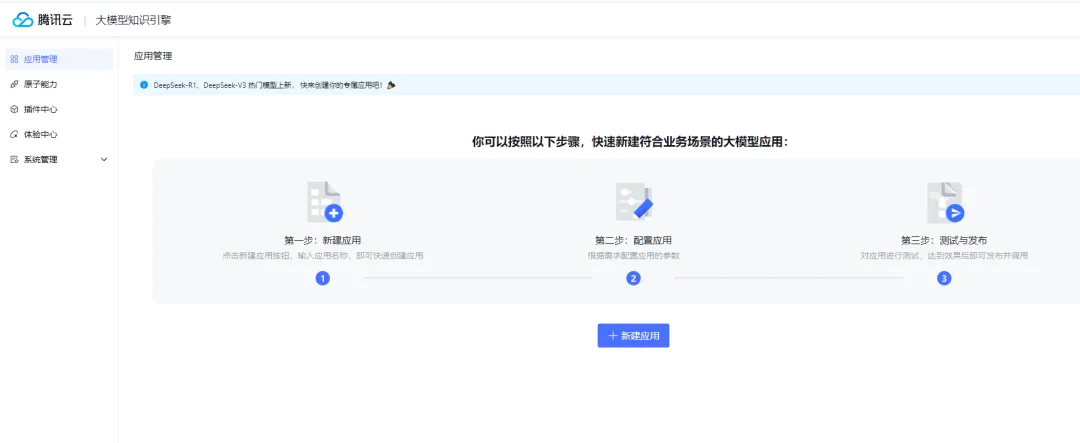
应用管理:个人创建的大模型应用管理主界面。如果没有创建应用的话,默认为创建界面。
 图片
图片
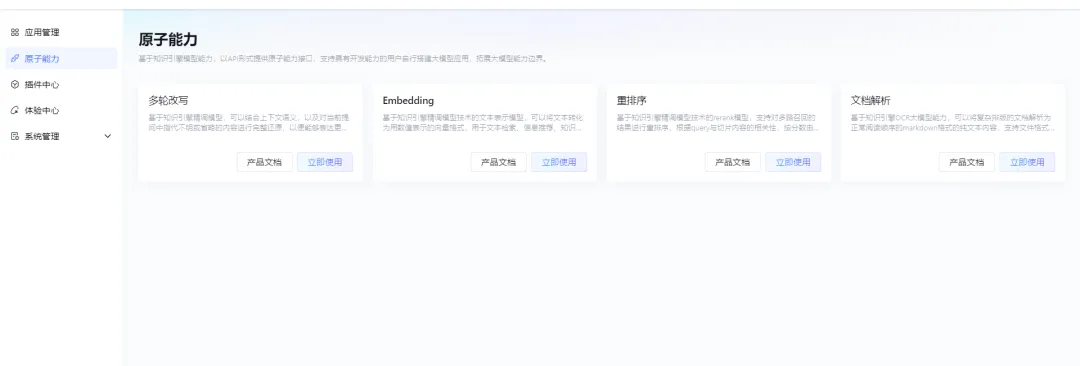
原子能力:已API接口的方式提供给开发者自行构建大模型专属应用。主要包括多轮改写、Embedding、重排序、文档解析四大能力。
 图片
图片
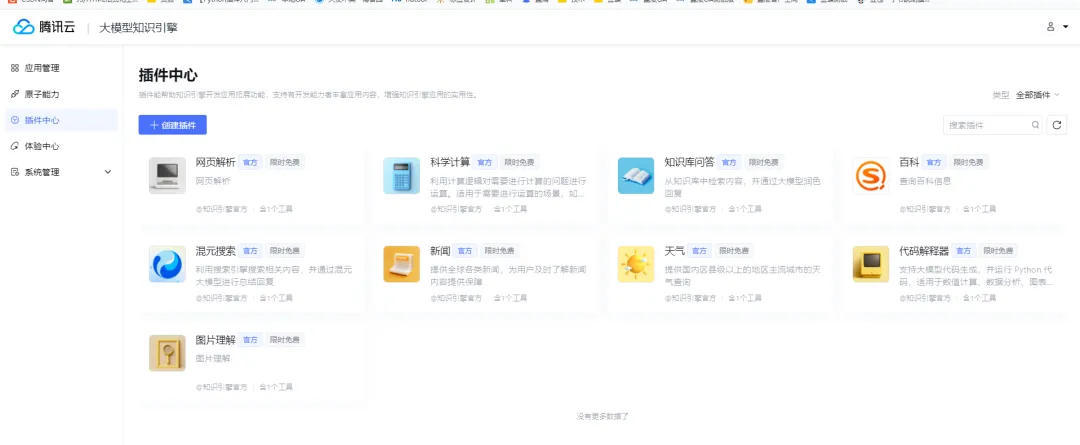
插件中心:通过插件能帮助知识引擎开发应用拓展功能,支持有开发能力者丰富应用内容,相当于是知识引擎应用能力的补充。
 图片
图片
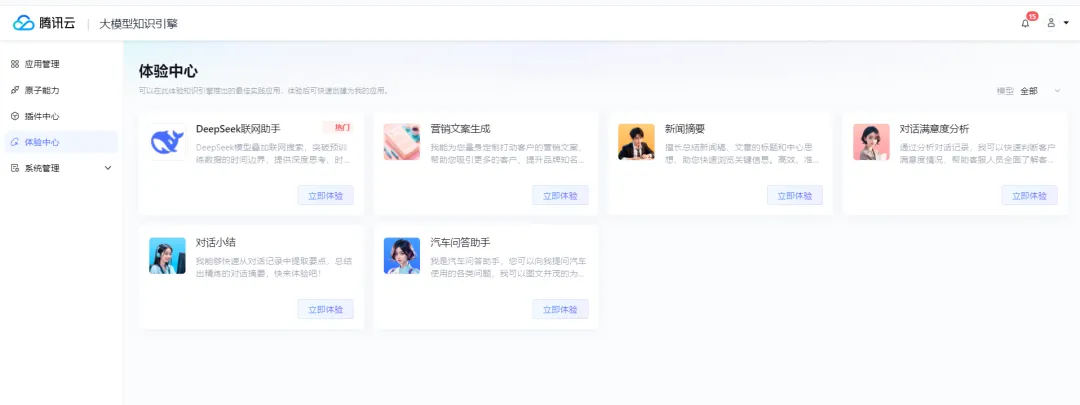
体验中心:基于知识引擎推出的最佳实践应用,大家可以基于推荐的应用创建为自己的应用,然后进行功能进一步丰富。
 图片
图片
腾讯云2月8日上线DeepSeek-R1及V3原版模型API接口,依托腾讯云强大的公有云服务,为大家提供了稳定优质的接口调用服务。这里主要依靠腾讯云提供的API接口来实现。
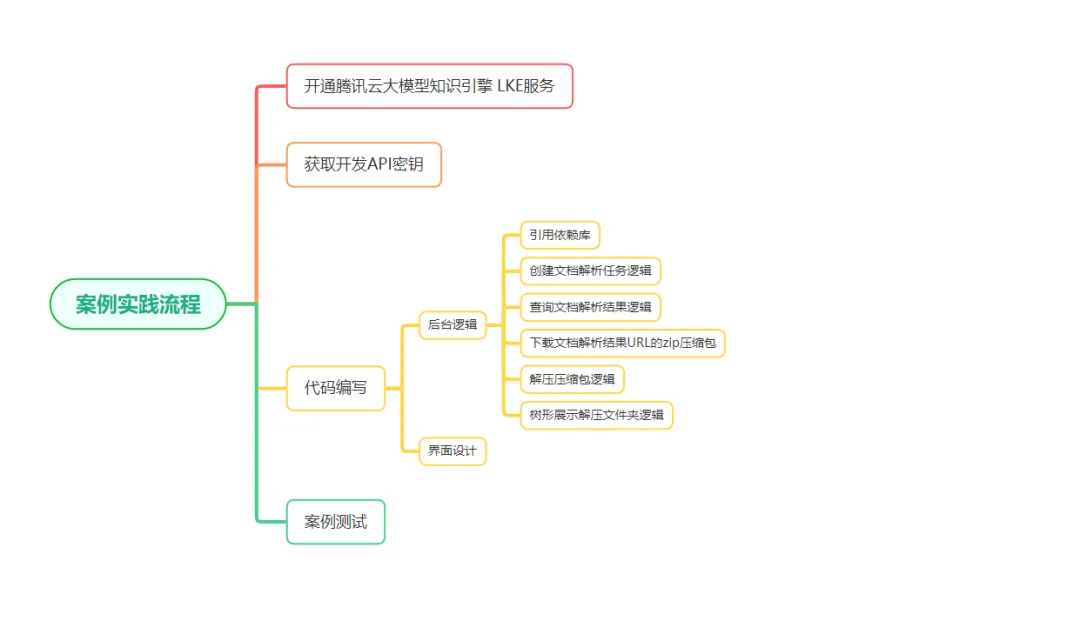
二、案例实战
使用技术:C#+VS2022+WinFrom
完整的案例流程如下图:
 图片
图片
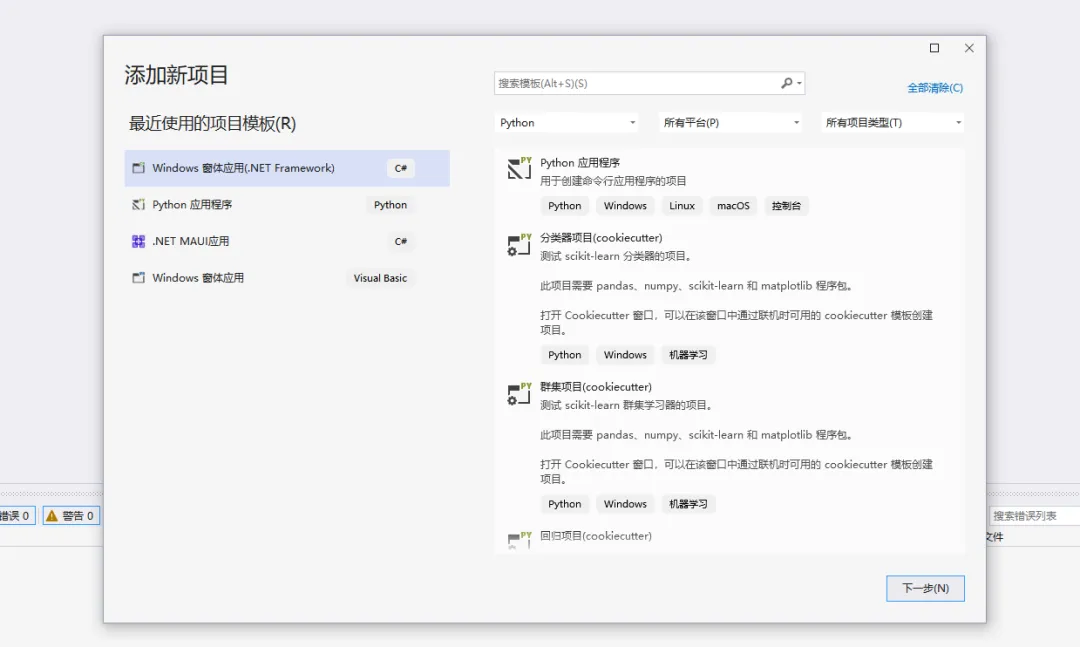
2.1、创建项目
首先打开vs2022创建一个Winfrom项目
 图片
图片
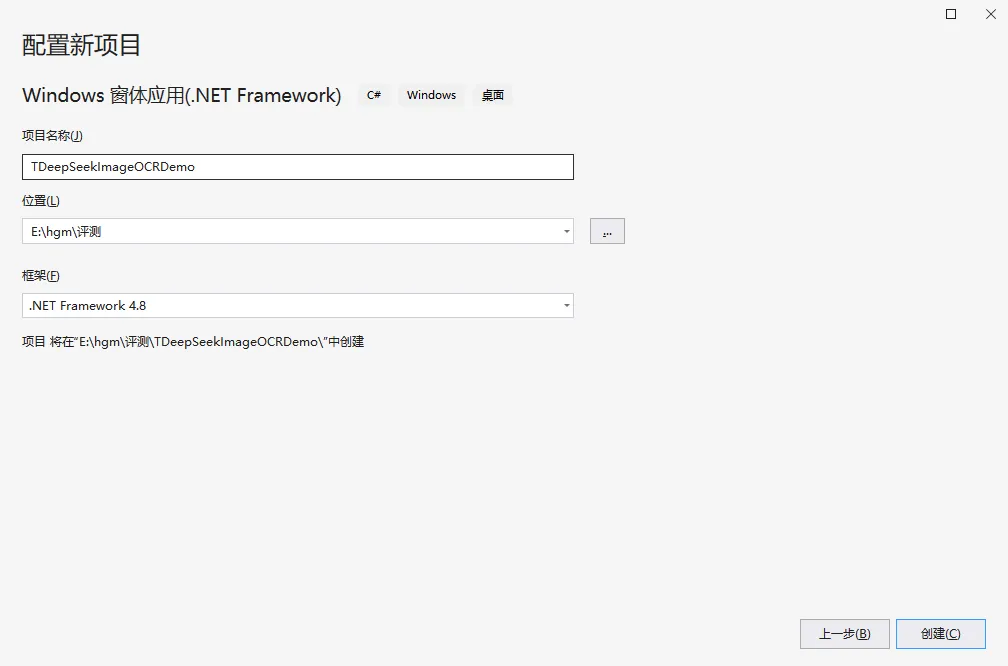
点击下一步输入项目名称【TDeepSeekChengYuDemo】,然后点击创建按钮。
 图片
图片
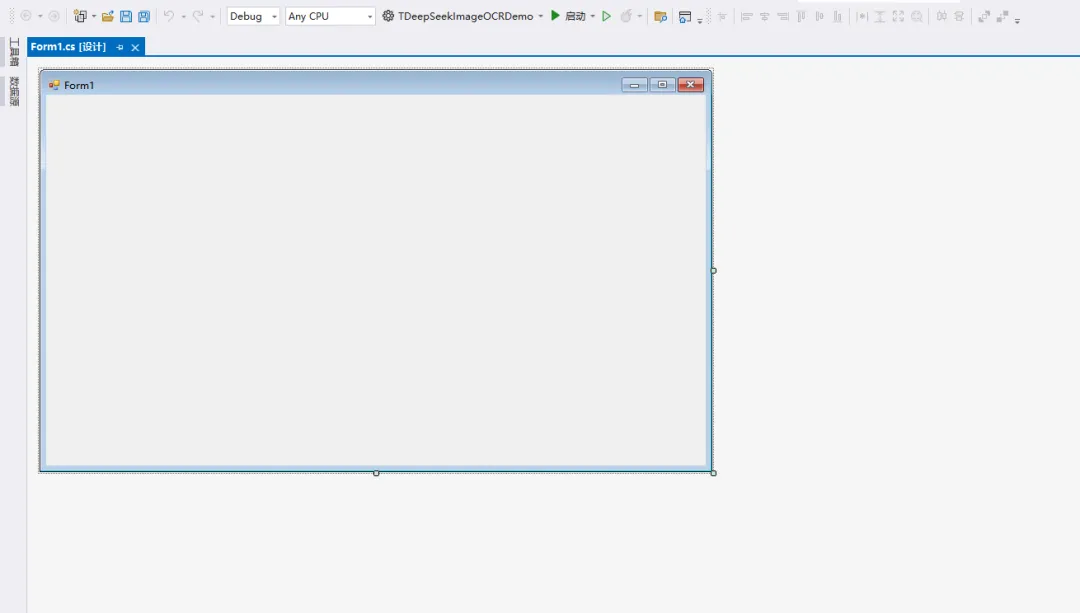
空白项目创建之后效果如下图:
 图片
图片
2.2、引入腾讯大模型知识引擎 LKE调用SDK依赖库
Nuget包管理器(推荐)
打开NuGet包管理器搜索”TencentCloudSDK.Lke“
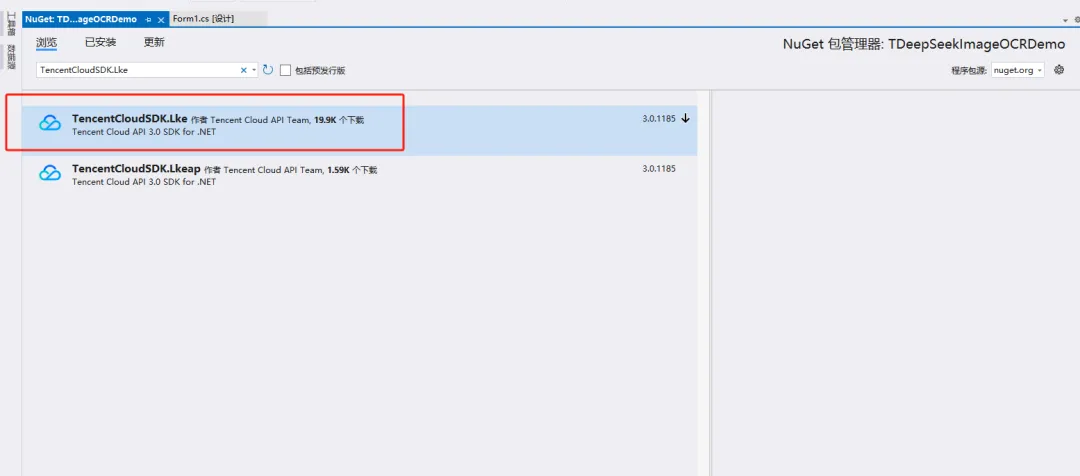 图片
图片
然后点击安装即可。安装成功之后效果如下图:
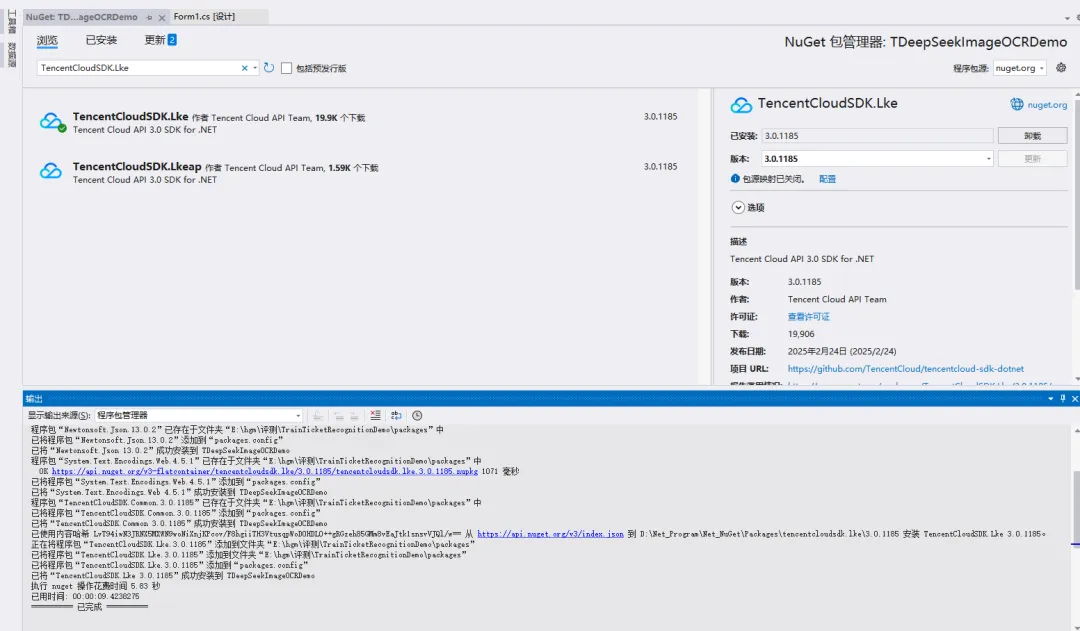 图片
图片
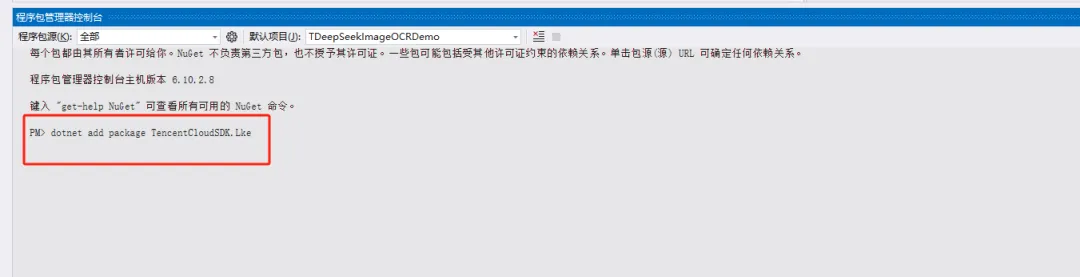
命令行方式
打开程序包管理控制台输入如下命令:
复制dotnet add package TencentCloudSDK.Lke dotnet add package TencentCloudSDK.Lke
 图片
图片
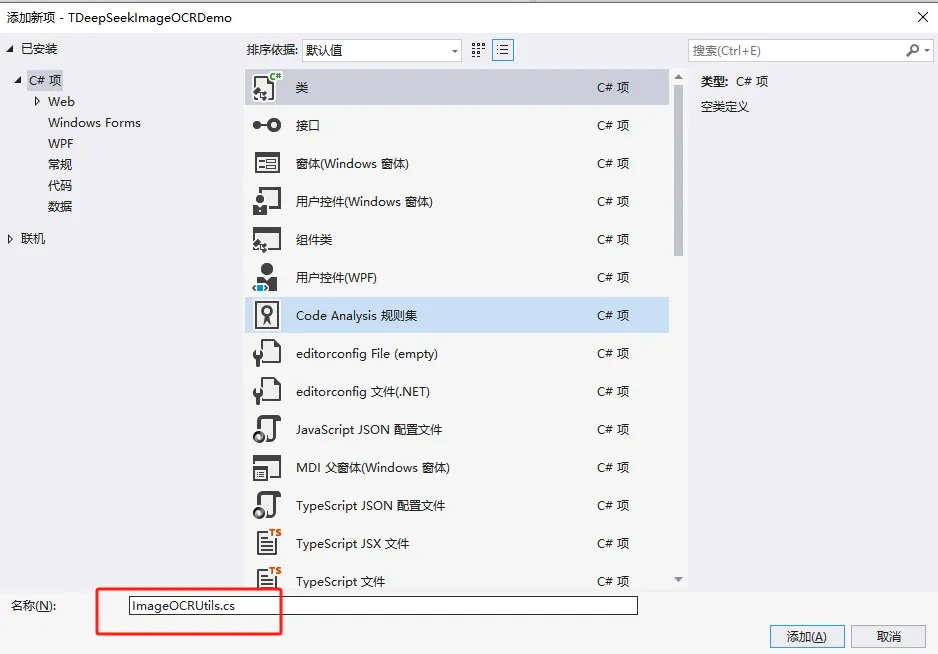
2.3、代码编写
然后新建一个工具类库ImageOCRUtils.cs用来调用大模型API接口,创建如下图:
 主要代码逻辑
创建文档解析任务的方法
参考官方SDK示例进行封装方法如下:
复制/// <summary> /// 第一步 创建文档解析任务 /// </summary> /// <param name="imageUrl"></param> /// <returns></returns> public static string CreateImageOcrTask(string imageUrl) { try { // 密钥可前往官网控制台 https://console.cloud.tencent.com/cam/capi 进行获取 Credential cred = new Credential { SecretId = "", SecretKey = "" }; // 实例化一个client选项,可选的,没有特殊需求可以跳过 ClientProfile clientProfile = new ClientProfile(); // 实例化一个http选项,可选的,没有特殊需求可以跳过 HttpProfile httpProfile = new HttpProfile(); httpProfile.Endpoint = ("lke.tencentcloudapi.com"); clientProfile.HttpProfile = httpProfile; // 实例化要请求产品的client对象,clientProfile是可选的 LkeClient client = new LkeClient(cred, "ap-guangzhou", clientProfile); // 实例化一个请求对象,每个接口都会对应一个request对象 CreateReconstructDocumentFlowRequest req = new CreateReconstructDocumentFlowRequest(); req.FileUrl = imageUrl; CreateReconstructDocumentFlowConfig createReconstructDocumentFlowConfig1 = new CreateReconstructDocumentFlowConfig(); createReconstructDocumentFlowConfig1.TableResultType = "1"; createReconstructDocumentFlowConfig1.ResultType = "0"; req.Config = createReconstructDocumentFlowConfig1; // 返回的resp是一个CreateReconstructDocumentFlowResponse的实例,与请求对象对应 CreateReconstructDocumentFlowResponse resp = client.CreateReconstructDocumentFlowSync(req); // 输出json格式的字符串回包 Console.WriteLine(AbstractModel.ToJsonString(resp)); return resp.TaskId; } catch (Exception e) { Console.WriteLine(e.ToString()); return "-1"; } }
/// <summary>
/// 第一步 创建文档解析任务
/// </summary>
/// <param name="imageUrl"></param>
/// <returns></returns>
public static string CreateImageOcrTask(string imageUrl)
{
try
{
// 密钥可前往官网控制台 https://console.cloud.tencent.com/cam/capi 进行获取
Credential cred = new Credential
{
SecretId = "",
SecretKey = ""
};
// 实例化一个client选项,可选的,没有特殊需求可以跳过
ClientProfile clientProfile = new ClientProfile();
// 实例化一个http选项,可选的,没有特殊需求可以跳过
HttpProfile httpProfile = new HttpProfile();
httpProfile.Endpoint = ("lke.tencentcloudapi.com");
clientProfile.HttpProfile = httpProfile;
// 实例化要请求产品的client对象,clientProfile是可选的
LkeClient client = new LkeClient(cred, "ap-guangzhou", clientProfile);
// 实例化一个请求对象,每个接口都会对应一个request对象
CreateReconstructDocumentFlowRequest req = new CreateReconstructDocumentFlowRequest();
req.FileUrl = imageUrl;
CreateReconstructDocumentFlowConfig createReconstructDocumentFlowConfig1 = new CreateReconstructDocumentFlowConfig();
createReconstructDocumentFlowConfig1.TableResultType = "1";
createReconstructDocumentFlowConfig1.ResultType = "0";
req.Config = createReconstructDocumentFlowConfig1;
// 返回的resp是一个CreateReconstructDocumentFlowResponse的实例,与请求对象对应
CreateReconstructDocumentFlowResponse resp = client.CreateReconstructDocumentFlowSync(req);
// 输出json格式的字符串回包
Console.WriteLine(AbstractModel.ToJsonString(resp));
return resp.TaskId;
}
catch (Exception e)
{
Console.WriteLine(e.ToString());
return "-1";
}
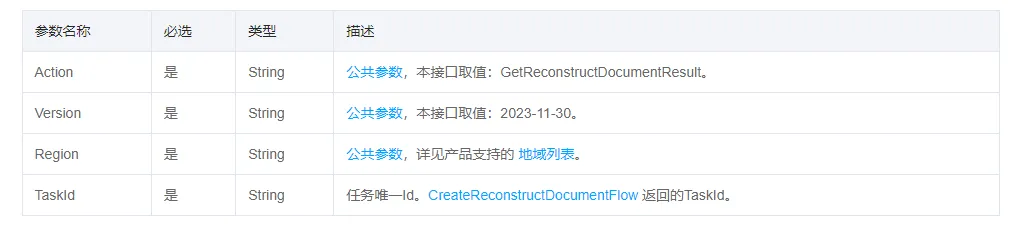
}输入参数引用官方文档;
表格 还在加载中,请等待加载完成后再尝试复制;
输出参数参考官方文档如下图:

正确返回参数json示例:
复制{ "TaskId": "cf79a3db3a3446cea2f96a14439091f3", "RequestId": "5a734b18-cfd4-43ad-851c-511fcc8bcb03"}查询文档解析结果逻辑
根据上一步获取的TaskId查询文档解析结果,返回值为文件URL,文件类型为压缩包,具体代码如下:
复制/// <summary> /// 第二步 根据任务ID获取文档地址 /// </summary> /// <param name="taskId"></param> /// <returns></returns> public static string GetResultDocumentUrl(string taskId) { try { // 密钥可前往官网控制台 https://console.cloud.tencent.com/cam/capi 进行获取 Credential cred = new Credential { SecretId = "", SecretKey = "" }; // 实例化一个client选项,可选的,没有特殊需求可以跳过 ClientProfile clientProfile = new ClientProfile(); // 实例化一个http选项,可选的,没有特殊需求可以跳过 HttpProfile httpProfile = new HttpProfile(); httpProfile.Endpoint = ("lke.tencentcloudapi.com"); clientProfile.HttpProfile = httpProfile; // 实例化要请求产品的client对象,clientProfile是可选的 LkeClient client = new LkeClient(cred, "ap-guangzhou", clientProfile); // 实例化一个请求对象,每个接口都会对应一个request对象 GetReconstructDocumentResultRequest req = new GetReconstructDocumentResultRequest(); req.TaskId = taskId; // 返回的resp是一个GetReconstructDocumentResultResponse的实例,与请求对象对应 GetReconstructDocumentResultResponse resp = client.GetReconstructDocumentResultSync(req); // 输出json格式的字符串回包 Console.WriteLine(AbstractModel.ToJsonString(resp)); return resp.DocumentRecognizeResultUrl; } catch (Exception e) { Console.WriteLine(e.ToString()); return e.ToString(); } }
/// <summary>
/// 第二步 根据任务ID获取文档地址
/// </summary>
/// <param name="taskId"></param>
/// <returns></returns>
public static string GetResultDocumentUrl(string taskId)
{
try
{
// 密钥可前往官网控制台 https://console.cloud.tencent.com/cam/capi 进行获取
Credential cred = new Credential
{
SecretId = "",
SecretKey = ""
};
// 实例化一个client选项,可选的,没有特殊需求可以跳过
ClientProfile clientProfile = new ClientProfile();
// 实例化一个http选项,可选的,没有特殊需求可以跳过
HttpProfile httpProfile = new HttpProfile();
httpProfile.Endpoint = ("lke.tencentcloudapi.com");
clientProfile.HttpProfile = httpProfile;
// 实例化要请求产品的client对象,clientProfile是可选的
LkeClient client = new LkeClient(cred, "ap-guangzhou", clientProfile);
// 实例化一个请求对象,每个接口都会对应一个request对象
GetReconstructDocumentResultRequest req = new GetReconstructDocumentResultRequest();
req.TaskId = taskId;
// 返回的resp是一个GetReconstructDocumentResultResponse的实例,与请求对象对应
GetReconstructDocumentResultResponse resp = client.GetReconstructDocumentResultSync(req);
// 输出json格式的字符串回包
Console.WriteLine(AbstractModel.ToJsonString(resp));
return resp.DocumentRecognizeResultUrl;
}
catch (Exception e)
{
Console.WriteLine(e.ToString());
return e.ToString();
}
}输入参数,引用官方文档如下图:
输出参数,引用官方文档如下图:
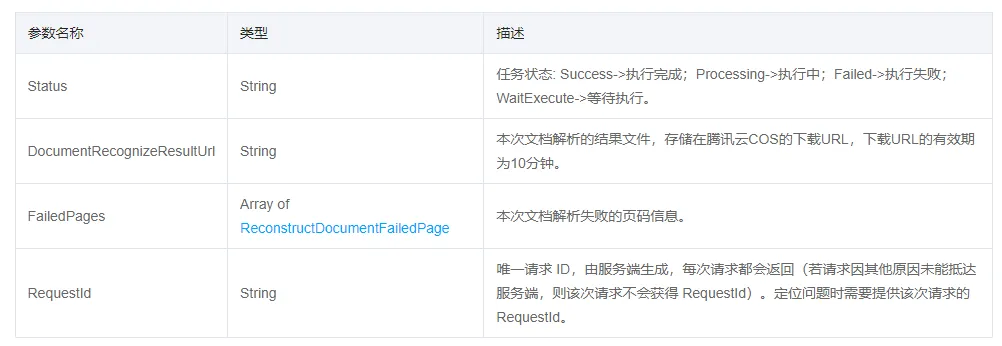
特别注意:
- 文档解析的结果文件,存储在腾讯云COS的下载URL,下载URL的有效期为10分钟。
- 需要创建和获取自己的API开发密钥,具体请访问 https://console.cloud.tencent.com/cam/capi
- 一定要妥善保存自己的开发API密钥,避免造成不必要的损失
正确返回json示例
复制{ "Status": "Success", "DocumentRecognizeResultUrl": "https://document-restruction-prod-1258344699.cos.ap-guangzhou.myqcloud.com/doc_parse%2Foutput_files%2F2025-02-25%2Fcf79a3db3a3446cea2f96a14439091f3.zip?q-sign-algorithm=sha1&q-ak=AKIDlWFap6HLNbidLwPqOrAKGzXrx40scL7l&q-sign-time=1740465273%3B1740465873&q-key-time=1740465273%3B1740465873&q-header-list=host&q-url-param-list=&q-signature=e03d151f58f281cc743c9968f6ce449c32a82cc9", "FailedPages": [ ], "RequestId": "e3cbb116-2650-4f09-ba7a-98c339360479"}
{
"Status"
:
"Success"
,
"DocumentRecognizeResultUrl"
:
"
https://document-restruction-prod-1258344699.cos.ap-guangzhou.myqcloud.com/doc_parse%2Foutput_files%2F2025-02-25%2Fcf79a3db3a3446cea2f96a14439091f3.zip?q-sign-algorithm=sha1&q-ak=AKIDlWFap6HLNbidLwPqOrAKGzXrx40scL7l&q-sign-time=1740465273%3B1740465873&q-key-time=1740465273%3B1740465873&q-header-list=host&q-url-param-list=&q-signature=e03d151f58f281cc743c9968f6ce449c32a82cc9
"
,
"FailedPages"
: [
],
"RequestId"
:
"e3cbb116-2650-4f09-ba7a-98c339360479"
}第三步根据文档URL下载压缩包到本地
复制/// <summary>/// 第三步 根据文档url下载文档识别后的ZIP/// </summary>/// <param name="fileUrl"></param>public static string DownloadFile(string fileUrl){ // 获取当前时间 DateTime now = DateTime.Now; // 格式化时间戳,确保文件名合法且不包含非法字符 string timestamp = now.ToString("yyyyMMdd_HHmmss_fff"); string filePath = @"D:\OCRTest\"+ timestamp+".zip"; // 文件保存路径 try { using (WebClient client = new WebClient()) { // 下载文件到指定路径 client.DownloadFile(fileUrl, filePath); return UnzipFile(filePath, timestamp); } } catch (Exception ex) { MessageBox.Show($"下载失败: {ex.Message}"); return "-1"; }}
/// <summary>
/// 第三步 根据文档url下载文档识别后的ZIP
/// </summary>
/// <param name="fileUrl"></param>
public static string DownloadFile(string fileUrl)
{
// 获取当前时间
DateTime now = DateTime.Now;
// 格式化时间戳,确保文件名合法且不包含非法字符
string timestamp = now.ToString("yyyyMMdd_HHmmss_fff");
string filePath = @"D:\OCRTest\"+ timestamp+".zip"; // 文件保存路径
try
{
using (WebClient client = new WebClient())
{
// 下载文件到指定路径
client.DownloadFile(fileUrl, filePath);
return UnzipFile(filePath, timestamp);
}
}
catch (Exception ex)
{
MessageBox.Show($"下载失败: {ex.Message}");
return "-1";
}
}说明:根据时间戳命名下载结果文件的Zip压缩包文件。
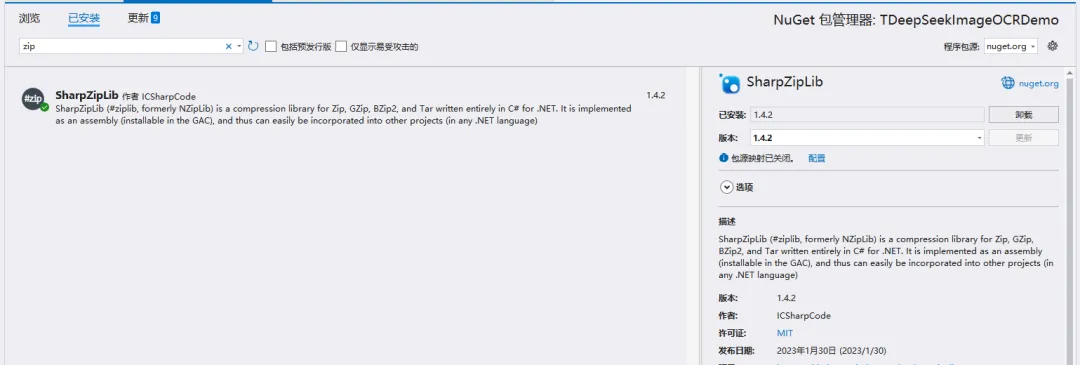
解压压缩包到指定目录,这里使用了SharpZipLib类库,大家直接使用nuget搜索安装即可。具体如下图:
 图片
图片
解压压缩包主要是为了得到目录结构进行TreeView控件展示,主要代码如下:
复制/// <summary> /// 第四步 解压zip 用来展示结果文件 /// </summary> /// <param name="zipFilePath"></param> /// <param name="destinationFolder"></param> private static string UnzipFile(string zipFilePath,string fileName) { try { string destinationFolder = @"D:\OCRTest\"+ fileName; // 确保目标文件夹存在 if (!Directory.Exists(destinationFolder)) { Directory.CreateDirectory(destinationFolder); } // 解压ZIP文件到指定的目标文件夹 (new FastZip()).ExtractZip(zipFilePath,destinationFolder, ""); Console.WriteLine("解压完成!"); return destinationFolder; } catch (Exception ex) { Console.WriteLine($"解压过程中发生错误: {ex.Message}"); return "-1"; } }
/// <summary>
/// 第四步 解压zip 用来展示结果文件
/// </summary>
/// <param name="zipFilePath"></param>
/// <param name="destinationFolder"></param>
private static string UnzipFile(string zipFilePath,string fileName)
{
try
{
string destinationFolder = @"D:\OCRTest\"+ fileName;
// 确保目标文件夹存在
if (!Directory.Exists(destinationFolder))
{
Directory.CreateDirectory(destinationFolder);
}
// 解压ZIP文件到指定的目标文件夹
(new FastZip()).ExtractZip(zipFilePath,destinationFolder, "");
Console.WriteLine("解压完成!");
return destinationFolder;
}
catch (Exception ex)
{
Console.WriteLine($"解压过程中发生错误: {ex.Message}");
return "-1";
}
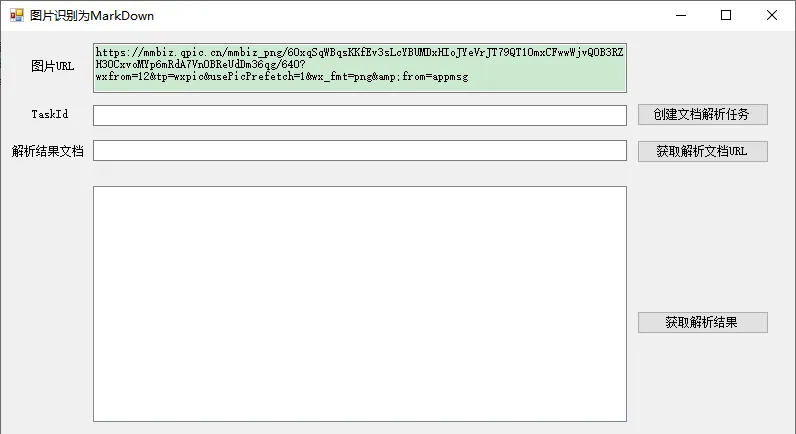
}2.4、界面设计
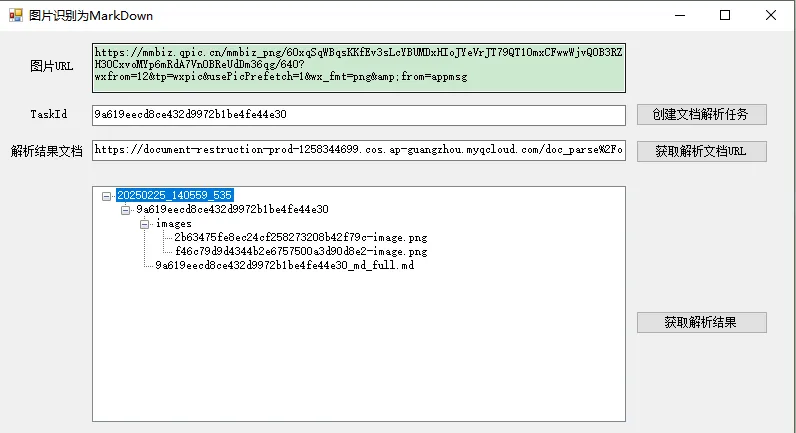
因为接口调用为异步调用为了方便快速实现分成了三个按钮:【创建文档解析任务】、【获取解析文件URL】、【获取解析结果】按照顺序点击进行解析结果的获取,界面效果如下图:
主要代码如下:
复制private void LoadFolderStructure(string folderPath) { // 清除现有的节点 treeView1.Nodes.Clear(); // 创建根节点 TreeNode rootNode = new TreeNode(new DirectoryInfo(folderPath).Name); rootNode.Tag = folderPath; // 存储路径信息以便后续使用 rootNode.Expand(); treeView1.Nodes.Add(rootNode); // 开始递归加载子文件夹 PopulateTreeView(rootNode, folderPath); } private void PopulateTreeView(TreeNode parentNode, string folderPath) { try { // 获取所有子文件夹 DirectoryInfo dirInfo = new DirectoryInfo(folderPath); DirectoryInfo[] subDirs = dirInfo.GetDirectories(); foreach (DirectoryInfo dir in subDirs) { TreeNode node = new TreeNode(dir.Name); node.Tag = dir.FullName; // 存储路径信息以便后续使用 parentNode.Nodes.Add(node); // 递归调用以加载子文件夹 PopulateTreeView(node, dir.FullName); node.Expand(); } FileInfo[] files = dirInfo.GetFiles(); foreach (FileInfo file in files) { TreeNode fileNode = new TreeNode(file.Name); fileNode.Tag = file.FullName; fileNode.ImageIndex = 1; // 文件图标索引 fileNode.SelectedImageIndex = 1; parentNode.Nodes.Add(fileNode); } } catch (UnauthorizedAccessException ex) { MessageBox.Show($"访问被拒绝: {ex.Message}", "错误", MessageBoxButtons.OK, MessageBoxIcon.Error); } catch (Exception ex) { MessageBox.Show($"发生错误: {ex.Message}", "错误", MessageBoxButtons.OK, MessageBoxIcon.Error); } } private void btnFirst_Click(object sender, EventArgs e) { if (string.IsNullOrWhiteSpace(txtFileUrl.Text)) { MessageBox.Show("请输入需要解析的图片URL"); } else { string taskId = ImageOCRUtils.CreateImageOcrTask(txtFileUrl.Text); txtTaskId.Text = taskId; } } private void btnResult_Click(object sender, EventArgs e) { string documentUrl = txtDocumentUrl.Text; if (string.IsNullOrWhiteSpace(documentUrl)) { MessageBox.Show("请先获取解析结果文档URL"); } else { if (documentUrl == "-1") { MessageBox.Show("解析结果文档UR获取失败!"); } else { string result = ImageOCRUtils.DownloadFile(documentUrl); // 可以在窗体初始化时加载文件夹结构 LoadFolderStructure(result); MessageBox.Show(result); } } } /// <summary> /// 获取文档URL /// </summary> /// <param name="sender"></param> /// <param name="e"></param> private void button1_Click(object sender, EventArgs e) { string taskId = txtTaskId.Text; if (string.IsNullOrWhiteSpace(taskId)) { MessageBox.Show("请先获取创建文档任务返回的TaskId"); } else { if (taskId == "-1") { MessageBox.Show("TaskId获取失败!"); } else { string documentUrl = ImageOCRUtils.GetResultDocumentUrl(taskId); txtDocumentUrl.Text = documentUrl; } } }
private void LoadFolderStructure(string folderPath)
{
// 清除现有的节点
treeView1.Nodes.Clear();
// 创建根节点
TreeNode rootNode = new TreeNode(new DirectoryInfo(folderPath).Name);
rootNode.Tag = folderPath; // 存储路径信息以便后续使用
rootNode.Expand();
treeView1.Nodes.Add(rootNode);
// 开始递归加载子文件夹
PopulateTreeView(rootNode, folderPath);
}
private void PopulateTreeView(TreeNode parentNode, string folderPath)
{
try
{
// 获取所有子文件夹
DirectoryInfo dirInfo = new DirectoryInfo(folderPath);
DirectoryInfo[] subDirs = dirInfo.GetDirectories();
foreach (DirectoryInfo dir in subDirs)
{
TreeNode node = new TreeNode(dir.Name);
node.Tag = dir.FullName; // 存储路径信息以便后续使用
parentNode.Nodes.Add(node);
// 递归调用以加载子文件夹
PopulateTreeView(node, dir.FullName);
node.Expand();
}
FileInfo[] files = dirInfo.GetFiles();
foreach (FileInfo file in files)
{
TreeNode fileNode = new TreeNode(file.Name);
fileNode.Tag = file.FullName;
fileNode.ImageIndex = 1; // 文件图标索引
fileNode.SelectedImageIndex = 1;
parentNode.Nodes.Add(fileNode);
}
}
catch (UnauthorizedAccessException ex)
{
MessageBox.Show($"访问被拒绝: {ex.Message}", "错误", MessageBoxButtons.OK, MessageBoxIcon.Error);
}
catch (Exception ex)
{
MessageBox.Show($"发生错误: {ex.Message}", "错误", MessageBoxButtons.OK, MessageBoxIcon.Error);
}
}
private void btnFirst_Click(object sender, EventArgs e)
{
if (string.IsNullOrWhiteSpace(txtFileUrl.Text))
{
MessageBox.Show("请输入需要解析的图片URL");
}
else
{
string taskId = ImageOCRUtils.CreateImageOcrTask(txtFileUrl.Text);
txtTaskId.Text = taskId;
}
}
private void btnResult_Click(object sender, EventArgs e)
{
string documentUrl = txtDocumentUrl.Text;
if (string.IsNullOrWhiteSpace(documentUrl))
{
MessageBox.Show("请先获取解析结果文档URL");
}
else
{
if (documentUrl == "-1")
{
MessageBox.Show("解析结果文档UR获取失败!");
}
else
{
string result = ImageOCRUtils.DownloadFile(documentUrl);
// 可以在窗体初始化时加载文件夹结构
LoadFolderStructure(result);
MessageBox.Show(result);
}
}
}
/// <summary>
/// 获取文档URL
/// </summary>
/// <param name="sender"></param>
/// <param name="e"></param>
private void button1_Click(object sender, EventArgs e)
{
string taskId = txtTaskId.Text;
if (string.IsNullOrWhiteSpace(taskId))
{
MessageBox.Show("请先获取创建文档任务返回的TaskId");
}
else
{
if (taskId == "-1")
{
MessageBox.Show("TaskId获取失败!");
}
else
{
string documentUrl = ImageOCRUtils.GetResultDocumentUrl(taskId);
txtDocumentUrl.Text = documentUrl;
}
}
}说明:主要包括按钮点击事件和加载解析结果的树形结构逻辑。
这里选择我之前文章的一个图片(主要是DeepSeek-R1模型介绍的图片)进行解析,图片如下:
 图片
图片
具体调用最终效果:
 图片
图片
说明:需要按钮步骤进行文档解析结果。
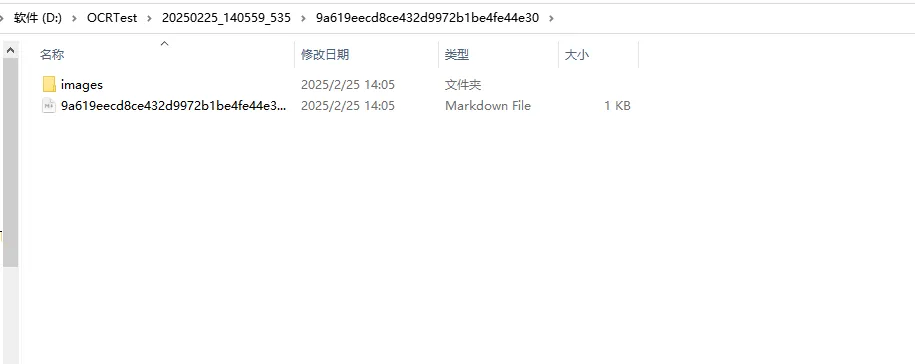
我们打开解析后的MarkDown文档查看解析的实际效果
文档结构如下:
 图片
图片
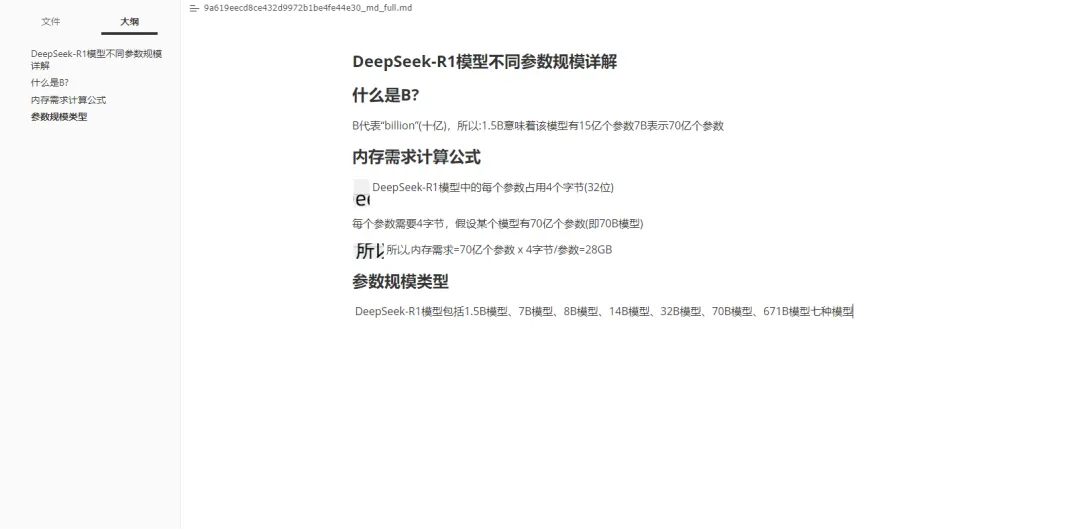
接着使用Typoa进行打开效果如下:
 图片
图片
整体解析的效果还是非常棒的。并且生成的MD文件进行了段落比较合理的分组。
三、总结
以上是基于腾讯云大模型知识引擎原子能力提供的文档解析接口轻松实现图片解析为MarkDown文档的小案例。